Tuesday, May 7, 2013

Girl Detective Party

My daughter turned eight this past weekend and in a stroke of amazing luck she didn't want a princess or fairy themed party! She wanted a Girl Detective theme. Can I just tell you how much fun this was to plan? Amazing, if I wasn't a nurse and I could make a career out of planning kids birthdays I would do it in a heart beat. I live for the planning, crafting and seeing the smiles on my kids' faces.

To be clear, the theme was Girl Detective, not Nancy Drew (she had never heard of Nancy Drew before, but now just a few days later is totally into it).  She said girl detectives would wear pink and green (pink to be girly and green because it's like camouflage, lol).

The most important part she said was finding her a "detective dress". It had to look like a shirt and have pink and green. She didn't make life easy, but I found this dress at Gymboree on sale for about $12 and she loved it :)


I made the banner on my cricut using the Birthday Bash cartridge (I love how this cartridge has different shapes for banners and the holes are cut out on the cricut eliminating the need to try to hole punch through layers of cardstock).

You can't really see it well in the photo, but the green is embossed with my Big Kick.


On the table I had gift bags for each girl, a secret message for them and several slips of paper turned upside down.


We started the party by having the girls sit down They each chose two of the pink/green papers and turned them over. The words they got formed their detective name. (There were plenty of extra so if they didn't like their words they could choose new ones). This was a HUGE hit. I was Rigatoni Ribbons. Some of the other names were Diamond Dolphin, Ruby Kansas, and Cupcake Sparkles. I don't think they even know my husbands real name, they just called him Macaroni Mittens all night.

In their gift bag I had a pair of dark sunglasses and a pack of fake mustaches. I had them put these on then stand in front of the wall where I took their picture. (I cut off the end of the pink table cloth and hung it on the wall as a backdrop).

Once I had all of the girls pictures I printed them off on the computer (using windows I chose the thumbnail size to print). I cut those out and had each girl attach their picture to a Detective ID badge I had made up on the computer beforehand. 

Then came the mystery. They had to follow a path of top secret clues to lead them to a prize (a basket with the Nany Drew movie, some chips and some candy for them all to share). 

When the girls opened this envelope there were seven slips of paper that appeared blank. I told them it was a mystery and they had to figure it out. Surprisingly one girl figured it out and yelled "It's invisible ink!" The girls ran upstairs to my daughters room where I had put a black light. This revealed the writing on the clues.

The way I made the code was probably too complicated, but they did enjoy it (some more than others). I wrote out the code on a large sheet of paper in highlighter and hung it on the wall (A=F, B=G, C=L, D=I etc;)  Each girl got one slip of the paper from the envelope and had to decode her part of the clue. Each paper had a number on the back, so once each section was decoded they lined up in order and read the clue out loud piece by piece which led them to the next envelope and they decoded that clue.

This is the black light bulb I got: 

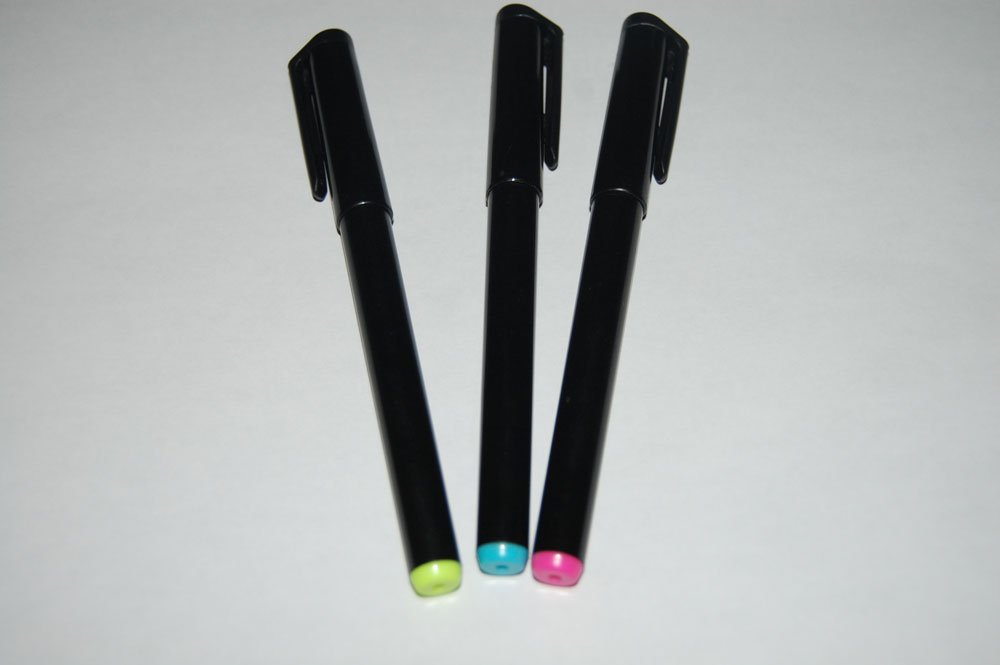
And these were the invisible ink markers:

Word of caution...if your kids draw all over their entire body with these while you aren't watching you won't realize it, lol. My kids had a little rash on their faces and arms and I couldn't figure out what was happening. Later that night I was in my daughter's room with her and she started glowing bright pink - she had totally colored her face in and I didn't even know it!


The party was a huge success, the girls had a ton of fun!

Thursday, March 21, 2013

Toy Story glasses

I crafted with my five year old son today and made some way-cool Toy Story Alien glasses :)

Check out the post on our  new challenge blog: Our Crafty Girls!

We are looking for a design team so we can get the blog up and running! Check out the blog for all the details.


Thursday, March 7, 2013

Looking for Design Team Members!!!

My sister and I have started our own craft challenge blog:


This is going to be a weekly challenge blog where both moms and their kids can create and enter projects. We need some help and want to build a great design team. Click on the link above to take you to the brand new blog and to get all the details.

Any questions send me an email to melissak.rn@gmail.com


Wednesday, November 21, 2012

Thanksgiving Placecards


Gosh, I have been away from my blog for so long! I've used my cricut here and there, but haven't had good reasons to make fun projects like I did when I was on the Cooking With Cricut design team over the summer. But, it's Thanksgiving and I'm hosting at my house so I wanted to make some cute place cards.

I used Cricut Classic Font and Mother's Day Bouquet for these cards.

I found a tutorial here at Doodlebug Design blog on how to make the pumpkins  I used Cricut Classic font to cut the circles that make the pumpkins,  free cut the stems by hand and the leaves are From Mother's Day Bouquet.


It was fun to dig through my orange prints, which I don't usually use!

I am entering these place cards into several different challenges:

Twisted Tuesdays (Thanksgivnig theme with a food on it)
Party Time Tuesdays (Color Inspiration)
Creative Inspirations Paint (Thankful for you)
Die Cuttin' Divas (Thanksgiving)
Exploring Cricut (Count Your Blessings)
My Craft Spot (Thanksgiving)
Paper Playtime (Anything Goes)

Wednesday, August 22, 2012

Surprise! Thank you Melin for 100 challenges at Cooking With Cricut


It's a surprise blog hop today for Melin, the leader at Cooking with Cricut who has organized 100 challenges as of today. She thought today's post was just another regular challenge that she had created, but Jen had a marvelous idea and SURPRISE, a blog hop celebrating Melin and the work and time she puts into Cooking With Cricut.

Melin started the Cooking With Cricut challenges in October 2010 to encourage crafters to find new and
different ways to use their Cricut cartridges.  And she has accomplished that and so much more!  She
has given scores of crafters a place on her Design Teams which quickly turned into a sisterhood of
women, who care for each other; who encourage each other; who lift each other and their families up in
prayer; and who have shared their hearts and their art through many outreach projects.


If you came from Jennie B's blog, Java Jen's Creations, you’re in the right place!  If you’ve joined us in mid-hop and would like to start at the beginning, please head back to Cooking With Cricut – you won’t want to miss any of these awesome cards!!


Melin welcomed me to the Cooking With Cricut family despite the fact that I am relatively new to paper crafting and have a blog with a very small following. The challenges give me the inspiration and nudge to craft more often - she really has helped me grow in my crafting and skill over this past six months. (This was obviously the inspiration for the card I made her!)


I used the cartridge Freshly Picked for this card. The papers are Coredinations which I embossed and sanded to bring out the color in the bottom layer (I love this paper, and it looks so much prettier in person!)


Thanks so much for hopping with us.  We hope you’ll join us and leave your own “thank you” in the
comment section for Melin at CWC!  Now it’s time to head on over to Jessica's blog: The Creative Stamper Spot – she’s the next stop on this party train!

And once again, Thank you Melin for all you do!

Wednesday, August 15, 2012

Back to School?!?! Cooking with Cricut Challenge

I can't believe I am typing these words...it's almost back to school time! For me this year is a bit bittersweet. My daughter is headed BACK to school, but my son starts his first day of kindergarten. Our first year with both kids in school and I cry at the drop of a dime about it! I have been mentally preparing for this for months and have come up with some fun little ways to make it more fun for them me. Let's face it, they aren't heartbroken over this, it's me that needs the emotional support!

Anyhow, I came across this awesome project to put jokes in your kids lunch boxes. You can find the original blog post and jokes here.

I took her jokes, cut them out and added them to a card I made using Cricut Classic Font.


The apple is cut from Cricut Classic Font. I used my gypsy to flip/weld two apples together to create a card. I also cut the circle from that font as well. (Apples are 2" in height and circles are 1.8" tall). I tied the stem with a twine to keep the card from opening up and accidentally giving away the punch line.

I know I won't keep this up all year, but as a fun first week back to school idea I am super excited. They love the little jokes on the side of their Gogurt at breakfast, so this is sure to be a big hit!

Back to school projects are always my favorites, we would love to see what you have come up with. Head over to Cooking With Cricut and link up your project. We can't wait to see what you create!

Thursday, August 2, 2012

3 Birds on Parade

Today I am showcasing my newest (and quickly becoming my most favorite) Cricut cartridge: 3 Birds on Parade. I have a quirky sense of humor and love to craft fun, bright projects so this cartridge is perfect for me!


Today I have made a few different projects to show you so you can see a few things this cute little cartridge has to offer.

Fist, the banner I made for my son's birthday. (He wanted a "camping birthday" which ended up being a ton of fun. Cook out, tent in the back yard and a cake that looked like a giant S'More...yum!). Anyhow, this little bird was perfect for his banner:


This project also shows you the font on this cartridge. At first I wasn't super crazy about it, but it has grown on me. The cut out in the center of each letter is a birds foot, so you would need just the right project to use it on. The font is also very chunky.


The next projects is a set of 4 Christmas Cards. I looooove these little guys!


These birds do take a lot of layers, but they are well worth it. They each have a very cute little expression that goes with them as well (I just struggled to get it cut small enough for the front of the card as they are pretty precise cuts. They seem like they would be better cut quite a bit larger than the 1 inch height I was looking for).  The caption of each photo tells you what the expression included on the cartridge is for each of the birds.

" Baby It's Cold Outside"

"Be Jolly"

"Deck the Halls"

"Happiest Holidays"

 My last projects are not something you would expect to see from this cartridge. I spend a lot of time on Pinterest and am currently obsessed with the trend of silhouettes of little birds. I used the base of one bird to create these two cards.  I cut the larger birds at 1/2 inch and the small birds on the sympathy card are 1/4 inch (teeny!). The embellishments and expressions are both stamps. I like finding cuts on cartridges that you can make things with that are unexpected. This bird would typically have two layers over this black shape to created an adorable little bluebird.


I hope you have enjoyed today's showcase and would love to see projects you have made with this cartridge. There are a lot of other cuts I can't wait to use (such as a super cute pirate and a superhero) but I haven't had the right occasion (yet!)